The number of applications available for smartphones. App development is the procedure followed to produce a software application for mobile devices, such as a smartphone or a tablet. It involves the design, coding, testing, and maintenance of applications, which can mean anything from simple utilities to complex interactive experiences.
This is a software designed to enable the developer to create apps on different OS, whether native to the very platform, as in web-based, or in hybrid versions, for example, iOS and Android.
That said, these days in a world where digital technology increasingly characterizes life and business at large, mobile applications have increasingly become one of the most significant and fundamental aspects of daily life. For the person, they offer literally everything from convenience to entertainment and the ability to find resources at one's fingertips, in ways that include managing one's personal finances or staying fit, connected with others. Mobile applications are simply simplified tools for customer engagement and facilitating improved service provision with the most valid elements of market expansion. They enable organizations to be at par with the technological market through availing experiences personally to their customers.
In this manual that has been aimed at easing beginners into the complexities of app development. This booklet outlines the process in manageable steps with the aim of giving a clear pathway to a person who is new in developing a mobile application. From basic concept and term clarifications to planning, designing, building, and launching your app, this guide is here to give you all you need to know to start off on this exciting venture in app development. If you are looking to create a simple app for a small audience or a more complex application for wider use, the following subsections will provide you with a step-by-step guideline on how to navigate every stage of the development process.
1. Understand the basics
Before you embark on your development journey, it will be wise to familiarize yourself with all the types of applications you can be able to build, the platforms that you can target, and some basic terms that you come across during the development process. This will ensure that, in your development of the app journey, you do so being guided.
Application Types
- Native Apps: The native applications are the ones designed for any of the platforms—either Android or iOS—using programming languages which are platform-specific and contain Java or Kotlin for Android and Swift or Objective-C for iOS. This can help the user understand that, in general, a native app has an offer of the best performance and user experience, since they have the capabilities to exploit all hardware resources of the device in which it is being run.
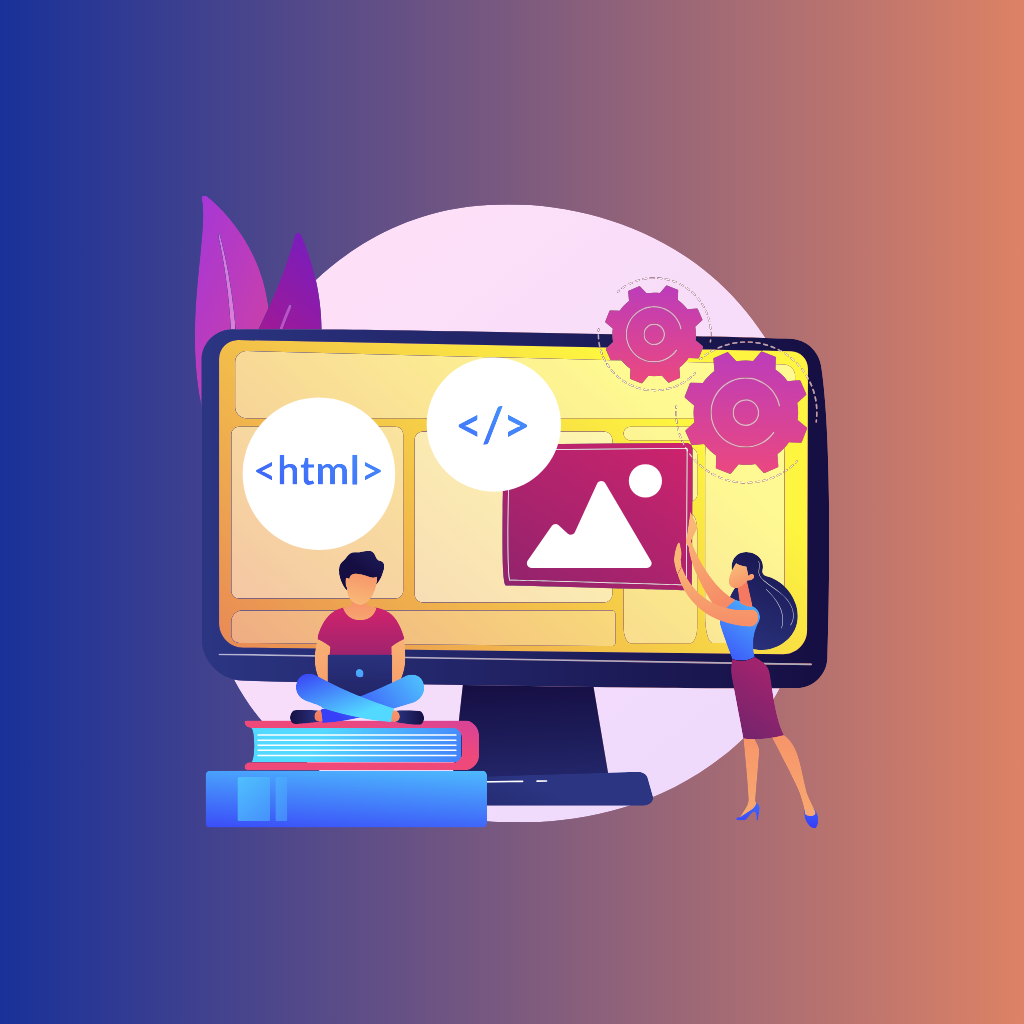
- Web Apps: Web applications are essentially websites designed to look and feel like native applications, which one gets to access through the web browser on their device. Some of the basic website technologies used in making them include HTML, CSS, and JavaScript. Easier to maintain between platforms, although they tend to be less feature-functional and performance compared to native applications.
- Hybrid Apps: These are apps that borrow some elements from native and web apps. The application is developed using web technologies, then placed in a native container. This allows for some access to native features of the device, yet relatively makes it easier and faster to develop for many platforms. Examples of tools used for hybrid app development are Cordova or Ionic.
Platforms for App Development
- Android: The most common operating system in the world. Build for Android to reach the largest possible user base. Development is usually done with Java or Kotlin.
- iOS: Targeting Apple's iOS platform opens your product to a huge market opportunity, particularly from the very profitable markets such as the U.S. and Europe. Development languages for iOS apps include Swift and Objective-C.
- Cross-platform: It's possible to write the code once, using technologies like React Native or Flutter, and deploy it on Android and iOS platforms. This can be one of the best ways in saving time and resources, given that both platforms will be addressed simultaneously.
Basic Terminology
- UI/UX: "User Interface" (UI) includes the hardware or software-related layout and other visual elements with which a user interacts, and "User Experience" (UX) represents the experience and satisfaction from using the application. Both are important to the success of the app—one focusing on the aesthetic, the other on functionality.
- Front-end vs. Back-end: This is the side of an app that an ordinary user never sees. It holds everything that a user could see or feel and includes design, graphics, and the user interface. Involving the server-side, the backend of the application is supposed to majorly take care of the data within the app, replying to the user's requests. This is where the application logic takes place, mostly including database management, user authentication, and server logic.
- API: An API stands for "Application Programming Interface," and it refers to a set of protocols, tools, and definitions that allow software entities to present their services and capabilities to other software entities. In mobile apps, APIs exist between the front end and back end, where they send and receive data to and from the app.
- Framework: Provides the base by which software developers can build programs for a given platform. Other frameworks for app development, such as React Native or Flutter, have plenty of pre-written codes, tools, and libraries that make mobile application development easier. They allow the developer to concentrate on creating very unique features for their apps. Armed with these basics, you will be much better off planning your app effectively, knowing the right type of app, platform, and tools needed in your project.
2. Planning Your App
When you move into the realm of app development, the planning stage is of absolute importance; it kind of lays the foundation on which the success of your app is to be based. It sets clear your vision, aligns your business strategy, and is also preparing for the development process.
Assessing the Purpose and the Target Audience
You should be able to understand the market environment where your app will compete beforehand. Market research will include analysis of competition and a good understanding of the industry trends, to identifying gaps that could be filled by your app.
This step is not just about seeing what's out there but also about pinpointing opportunities where your app can shine and offer something unique. In short, search for the popularity of other app categories between the lines, using tools like Google Trends, App Annie, or Sensor Tower. All these insights would be game-changers in forming a targeted approach of your app that aligns with real users' and market needs.
Identifying User Needs
In other words, an approach that can be applied to making an app that touches the users is understanding the users first. In other words, information on behaviors, preferences, and the kinds of problems met with the available solutions should be gathered. This valuable user insight can be collected by conducting surveys, interviews, or even using focus groups. The whole idea here is to capture what has been driving user satisfaction and how the app can make their life or workflow better.
Core features vs. nice-to-have features Then, according to this, you know your market and their needs. This defines what the app will offer. Here is where you would actually want to make a list of core features—those, in their turn, actually necessary for your app to work—and a wish list that could help improve user experience but wouldn't block an app's launch.
For example, real-time order tracking would be one of the core features of an app, while the ability for a user to reschedule his or her delivery time would be nice-to-have. Absolutely. Awesome clean interface, easy to use—just prioritize the core features so your development efforts go into building a solid app that meets primary user expectations, but leave some other nice-to-haves for later, when you have user feedback and more resources.
Design Considerations
User Interface and User Experience (UI/UX) Design
That is to say, it is not that much the look of your app as much as it is how easily and effectively a user can find his or her way around your app and get done what they came to get done. In short, a well-designed UI/UX is essential to retain and satisfy users, both of which lead to your app's ultimate success.
After you have chosen a layout for your application, keep in mind that its design should include easy navigation, information that goes hand in hand logically, and some visual branding elements. Design the first design mockups using Adobe XD, Sketch, or Figma. These are the tools that enable sharing with the team and potential users in order to get feedback on design improvement before design moving to development.
Accessibility Features
Any other aspect central to your app design to make sure that the app caters to persons of diverse abilities. These include such things as text sizes, easy-to-contrast color contrasts, voice commands, and easy-to-reach interactive elements for the disabled person. Make a conscious effort to accommodate the widest possible user base. Access features built into your app that will not only make it attractive for many more users but also demonstrate that you are concerned about the inclusivity of all peoples. Use the Web Content Accessibility Guidelines (WCAG), and mobile operating systems, in particular, to make your application accessible to most of its users.
3. Tools and Technologies
That is where technology selection and correct tooling of the app development come into play, as it is what directly reflects on the efficiency, functionality, and scalability of your app. The section provides an overview for the right choice of development tools and popular development frameworks while explaining how to use version control systems properly.
Development Environments and IDEs
Integrated Development Environment (IDE): A bundle of essential tools to enable a developer to write, test, and debug code, within which one can select the programming languages and types of apps being developed.
- When it comes to development, Android recommends using an IDE, ideal for it, the official one, such as Android Studio, which will come with all the tools a developer might need when developing apps for the Android OS.
The best environment is Xcode for iOS applications. It's even crafted for macOS and iOS applications, easily integrated with Swift and Objective-C.
Both environments will provide simulators for testing your app in all kinds of conditions, tools needed for debugging and coming up with solutions for your bugs, and integrations with different software to make your work more productive.
Programming Languages
The most important aspect is to choose the right programming languages that can largely impact the performance and maintainability of your application.
- Leading choice for iOS App Development is Swift: Powerful and Intuitive - allowing developers to craft apps faster with less errors.
- Development of Android applications is preferred in Kotlin, one of the safest and most concise languages that allow source code to be written with brevity, hence keeping the size of the source code small for improved legibility.
Both languages have been designed to interoperate fully with their older counterparts: Objective-C and Java, respectively, in order to afford developers a huge array of libraries and frameworks at their disposal.
Introduction to Development Frameworks
Frameworks provide you with a starting structure for building your apps, pre-written code, which can massively speed development.
React Native
React Native enables you to develop native-rendered apps for iOS and Android using a single codebase, basically writing one app and running it on either platform. It saves the cost and time associated with the development of apps and is pretty efficient to keep your apps updated as you move forward.
Flutter
Another great choice that Google supports is Flutter. It is a Dart-based framework that pays a lot of attention to high-performance, pretty UIs. Among the most known, Flutter supports rapid development cycles and flexible UIs, which can be customized and animated in manners that other frameworks might prevent.
Xamarin
Owned by Microsoft, Xamarin uses C# in creating applications for Android, iOS, and Windows. In fact, its usage enables sharing up to 90% of the code across the platforms, giving teams well versed in the Microsoft ecosystem, hoping to leverage pre-existing skills, a great advantage.
Version Control Systems
Introduction to Git
Git is the most popular current version control system. It follows, over time, changes to your source code, and it really keeps each and every modification you make.
In the case of a mistake, developers can turn the clock back and refer to earlier versions of the code to assist in fixing that mistake with the least possible amount of disturbance to all team members. GitHub and GitLab.
- GitHub is a web hosting service for software development projects that use the Git revision control system. GitLab offers a web-based Git repository manager that includes issue tracking and CI/CD pipeline configurations. They both are an essential platform in managing collaborative projects, reviewing code, and keeping a full history of your app development lifecycle.
4. Designing the app
Designing your app is way beyond good-looking—it's all about creating an intuitive and effective user experience. This stage is very important because it presents your idea in a visual, interactive blueprint. We'll cover three key design stages: wireframing, prototyping, and polishing of the user interface design.
Wireframing
Wireframing is the first step to visualizing your app. In the simplest of terms, it is a blueprint showing details and the layout of each screen or page of your app.
They help focus on what the screen is doing rather than what it looks like. They greatly help in aligning the team around functional requirements of the app before diving too far into the weeds of detailed design elements.
Examples of popular wireframing tools:
- Balsamiq: Good for low-fidelity wireframes to prompt more focus on structure than on aesthetics.
- Adobe XD: Offers wireframing tools that can easily graduate to high-fidelity prototypes.
- Sketch: Known for its clarity and effectiveness when creating either wireframes or detailed designs.
This is usually all the included built-in libraries that come to the aid of some very fast iteration and some highly dynamic projects.
Prototyping
Transition from Wireframes to Prototypes: The next part of the process is prototyping. With prototyping, add interaction to the wireframe and simulate user paths within the app. Verify the role will guarantee the flow of experience for the user, just as the developer intended.
Tools to support prototyping:
- InVision: Allows designers to upload their static designs and quickly link them up to create interactive prototypes.
- Figma: It's also made with real-time collaboration features that enable teams to work together on prototypes. It integrates design and prototype to have everything in one place.
- Axure RP: Ideal for creating high-fidelity prototypes with the ability to simulate complex interactions, and even realistic data-driven processes.
This last one helps in proving the functionality and usability of your app before development begins. Use of prototypes may apply to user testing in order to collect feedback and make required changes.
User Interface Design
Color Schemes
Your choice of color scheme is very important as it will determine the aesthetic appeal at large and kind of feeling in specific that the user will have towards your app. Color schemes must agree with your brand identity and must work in good harmony with further reading or usability. Use tools like Adobe Color or Coolors to help develop and refine your color palette.
Typography and Icons
Use human-friendly typographies that influence readability and, for this reason, the overall experience. Be careful with your font choices: You might be surprised by the number of Google Fonts optimized for the web. And last but not least in importance, there are icons. Make them look intuitive and follow one pattern in the app. Don't invent the wheel and don't create them on your own—popular libraries like Font Awesome or Material Icons will do the trick.
Design Systems
So, a design system can come in handy in doing large projects. These are, in fact, sets of reuse components guided by clear standards, that can be combined with each other to be built into any number of applications. It handles design systems, ensuring that every change to the UI of your app is consistent in every aspect.
5. Building the app
This is where the ideas and designs finally turn into products. The next session will talk about setting up the development environment, coding the core functionalities, and testing everything toward perfection. Take it step by step with us.
Setting Up the Development Environment
IDE Installation and Configuration
First step in actual development is setting up your development environment, which involves selecting and configuring the Integrated Development Environment (IDE). This may be:
- Xcode: A complete software development toolkit for Mac that includes everything iOS developers need to write code, test the app in the included iOS Simulator, and submit to the App Store.
- Android Studio: Encouraged for Android development, it is downloadable from the Android Developer website and contains all the required tools for an Android app, from the Android Software Development Kit (SDK) to emulators that test your app on various Android devices.
Set up your IDE by configuring the SDK paths, installing necessary plugins, and configuring emulator or physical device testing environments. Ensuring your IDE is properly configured will save you time and frustration at a later stage.
Coding Basics
Set up the skeleton of your app to get the core functionalities in place—in other words, start coding. You might start with the main navigation or even create the login page. Use Swift for iOS or Kotlin for Android. Focus on writing clean, efficient, and well-documented code to ease future maintenance.
Reading and Using APIs
Modern applications are tightly integrated with web services and need to communicate with remote servers. This is done through Application Programming Interfaces (APIs). Learning to read and use APIs is key to fetching data from the server, sending data back, and integrating third-party services.
For example, if your application needs weather data, you would use the OpenWeatherMap API to retrieve current weather conditions by sending HTTP requests and handling responses. Practice with APIs like these will help you understand the patterns and protocols for networking in mobile apps.
Testing Your App
Testing is one of the most critical phases during the development of your app that assures quality and stability across phases:
- Unit Testing: Testing individual components of the app to ensure each part functions correctly in isolation. Use XCTest for iOS and JUnit for Android to automate this process.
- Integration Testing: Verifies the behavior between different pieces of your app. For example, testing how an application may interact with the database in conjunction with its application logic.
- System Testing: Tests an integrated software product against the specified requirements of the whole system.
- User Acceptance Testing (UAT): The ultimate test level, where actual users test the application under realistic conditions to validate that end-to-end business flow is processed through the application. It helps ensure that the application is production-ready.
Using automated testing tools and CI/CD (continuous integration/continuous deployment) pipelines will smooth out the testing process, making it easier to discover and eliminate bugs as development progresses.
6. Launching Your App
Launching your app is the culmination of your hard work in design and development, but it's also just the beginning of its life in the market. This stage is quite critical since it involves everything from the final preparations, the actual publishing of the app, up to the post-launch strategies to keep the app floating. We will go through each of these in detail.
Preparing for Launch
Final Testing Repeating
Before your app reaches the light of day, final testing is quintessential to ensure there are no bugs and the app is user-friendly. This will include a mix of:
- Regression Testing: To make sure that a recent change to a program or code has not broken any existing functionality.
- Load Testing: To find out how an application behaves under peak loads, as this is very crucial for high-demand applications.
- Security Testing: To ensure that the application has enough security, and its data is secure from vulnerable risks.
Final testing should be done with all carefulness to avoid any serious issues that may raise problems in user retention and the general credibility of the app.
Pre-Launch Checklist
A Pre-Launch Checklist will help you align all elements needed to have a smooth launch. Essential items in this list include:
- App Store Optimization (ASO): Ensures that the application name, description, keywords, and even the screen captures are properly optimized for visibility in the app stores.
- Legal and Compliance Checks: Make sure your app complies with legal requirements, for example, laws of data protection and user privacy.
- Backup Plans: Setting up proper backup systems and having in place a disaster recovery plan.
Publishing Your App
Submission Process to the App Store and Google Play
Next comes publishing your app: submit it to the Apple App Store if it's for iOS apps, and to Google Play for Android apps. Each has its own set of guidelines and requirements.
- Apple App Store: Comes with a very long review process that ranges from some days to even a few weeks. Be sure your app meets the rigorous design, privacy, content, and functionality guidelines set by Apple.
- Google Play: Has a bit faster approval process, but would still want you to respect the policies and standards set by Google.
Post-Launch User Feedback Collection
After launch, do make sure to collect every possible user comment in order to understand the reception of your app. Tools such as in-app surveys, feedback forms, and monitoring app reviews are very useful. Take note of what they liked, didn't like, and features they would love to see in the next updates.
Iterative Improvements Based on Feedback
Use the feedback to iterate improvements on your app. Regular updates are for more than just fixing bugs but refining the features, adding new content that will keep your app relevant and useful. It is this cycle of continual improvement that will keep users returning, maintaining high levels of engagement.
Conclusion
So, launching a new app can be intimidating and exciting all at the same time. Along the way in this guide, we've run the gamut of every critical phase in the process of building out your app – from ideation to final launch and then on into the post-launch phase. Here's a quick recap:
- Understand the Basics: We understand the different types of native, web, and hybrid apps to check for their suitable platforms. We demystified some basic terms that are foundational to any app developer.
- Planning Your App: At this point, your app clearly has its purpose and target audience. You also have a full list of implemented features and have given thought to important design aspects that will make user interaction delightful.
- Tools and Technologies: Explained to you the importance of picking the right set of development tools, introduced some of the popular development frameworks, and explained to you the important role that version control systems play in app development.
- Designing Your App: We have covered wireframing, prototyping, and finer details of UI design in detail. We recommended making sensible, user-centered design decisions.
- Build the App: Subjects to be covered will include setting up your development environment, essentials of coding, and types of testing you must execute before your application hits the road.
- Launching Your App: Last but not least, we have considered those final activities related to launching your app; the submission process to the app stores, activities in the marketing to raise the visibility and excitement levels amongst customers, and, finally, the importance of ongoing improvements derived from customer feedback.
Every step matters. It builds up and reaches out to the launching of a product that is meant not only to meet but rather to exceed user expectations. This is a very streamlined version of everything that needs to happen, but it's all doable with the right resources and help.
If you're starting to think about building an app of your own, don't easily be put off by how the process just sounds like a loop of sheer complexity. Every journey does begin with one step, and every great app was at one point just somebody's idea. This guide will help you through the challenges of developing an app. Jump in, start small, and learn along the way. There is no better time than now to take that first step toward greatness. Your app can be the next big thing, and that all starts with your initiative to begin.
